After using Altium Designer for many years, I recently decided to move all my PCB design work to KiCAD. Altium is still a great tool, and I still use it from time to time for certain projects. But KiCAD has improved a lot and now offers many powerful features and without the cost. To make the switch easier, I adjusted several settings in KiCAD to feel more like Altium. In this post, I’ll share some key configurations that helped me bring the best of Altium into KiCAD
Even if you’re not using KiCAD or Altium, I highly recommend making sure your EDA tool offers similar features—or finding ways to enable them. Whether you’re a beginner or an experienced designer, these features aren’t just nice to have, they’re productivity boosters.
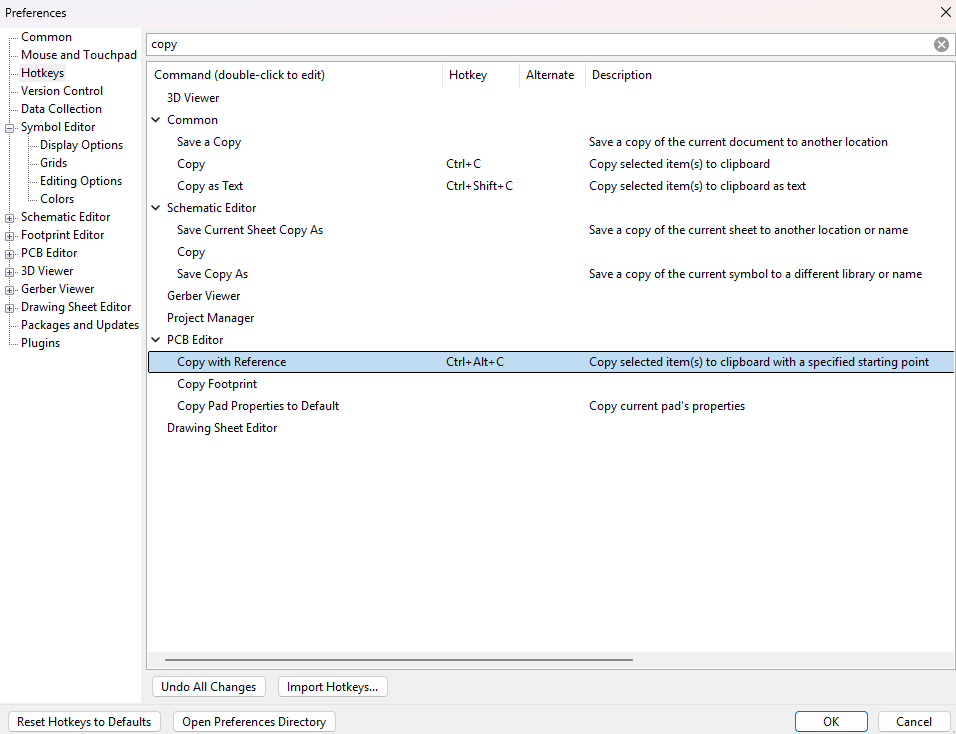
Copy with Reference
The Copy with Reference feature allows you to copy any object or group of objects using a defined reference point (zero point). I find this extremely useful when working on symmetrical layouts or duplicating circuit blocks with precise alignment.
This feature is also available in KiCAD, but it’s disabled by default. To use it, you’ll need to manually assign a hotkey in the preferences. Once enabled, it works just like in Altium.
Here’s how I set mine up:
- Go to Preferences → Preferences → Hotkeys
- Search for “Copy with reference”
- Assign it to a key combination (e.g.
Ctrl+Alt+C)
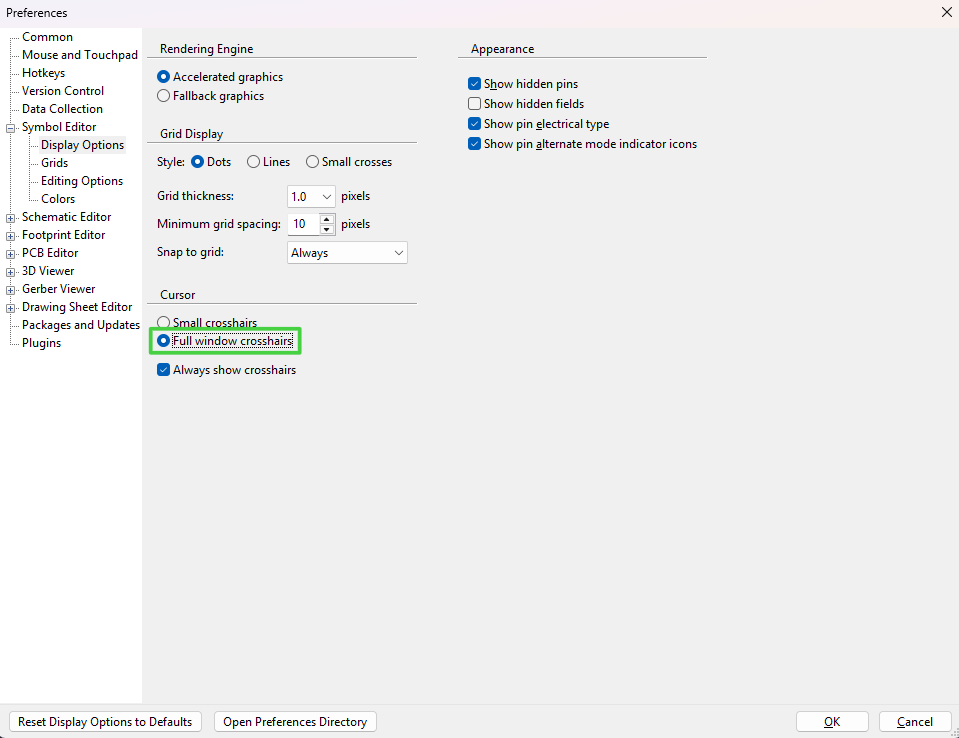
Full Window Crosshair
Full Window Crosshair extends vertical and horizontal guide lines across the entire canvas, following your cursor. It’s incredibly useful for aligning components and routing traces with visual precision, especially on densely populated boards or when doing precise placement work.
This feature is disabled by default in KiCAD, so you’ll need to manually enable it in each editor you use. Make sure to turn it on for:
- Symbol Editor
- Schematic Editor
- Footprint Editor
- PCB Editor
Enabling this across all editors helps maintain consistency and improves your overall design accuracy.
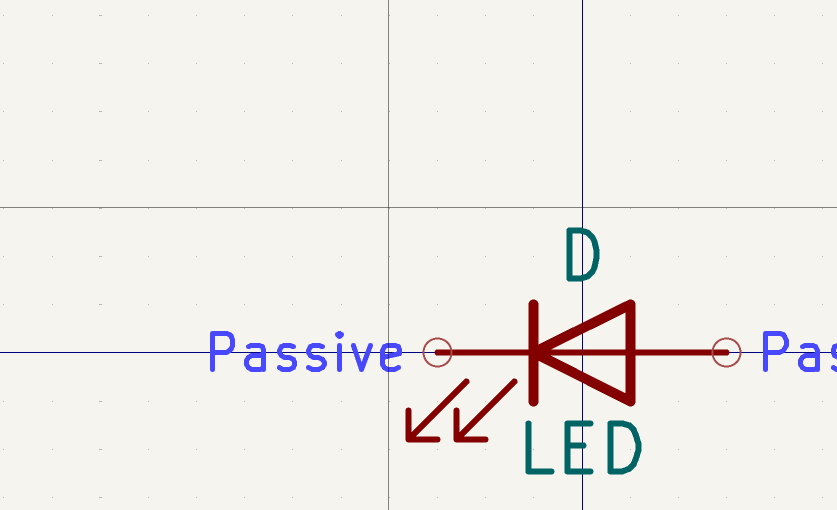
The result:
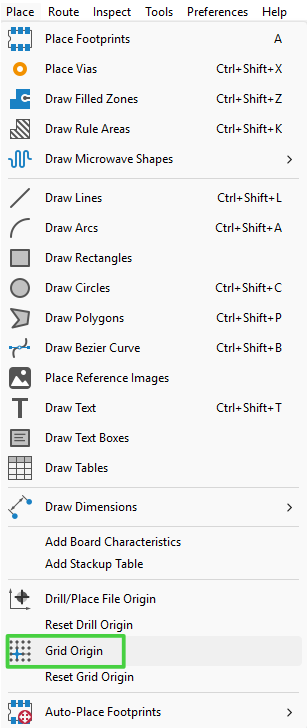
Display Origin
Make sure to set the Display Origin to Grid Origin. This small change ensures that all your measurements and placements are referenced from a consistent point, making alignment and layout much more predictable, just like in Altium.
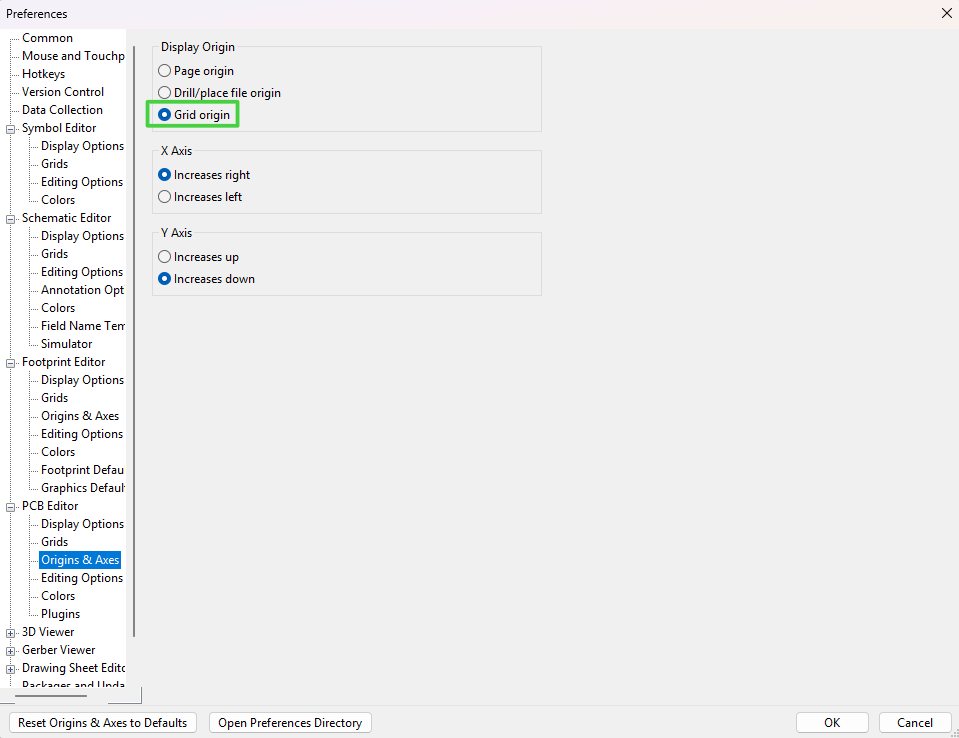
By default, KiCAD places the origin at the top-left corner of the page, which often isn’t ideal. To adjust the zero origin:
- Go to Place → Grid Origin
- Click to move the origin to the desired location, typically the center of your board or a logical starting point in your layout.
Voilà! You now have your coordinate system centered exactly where you want it, which makes working with absolute positions and alignment far easier.

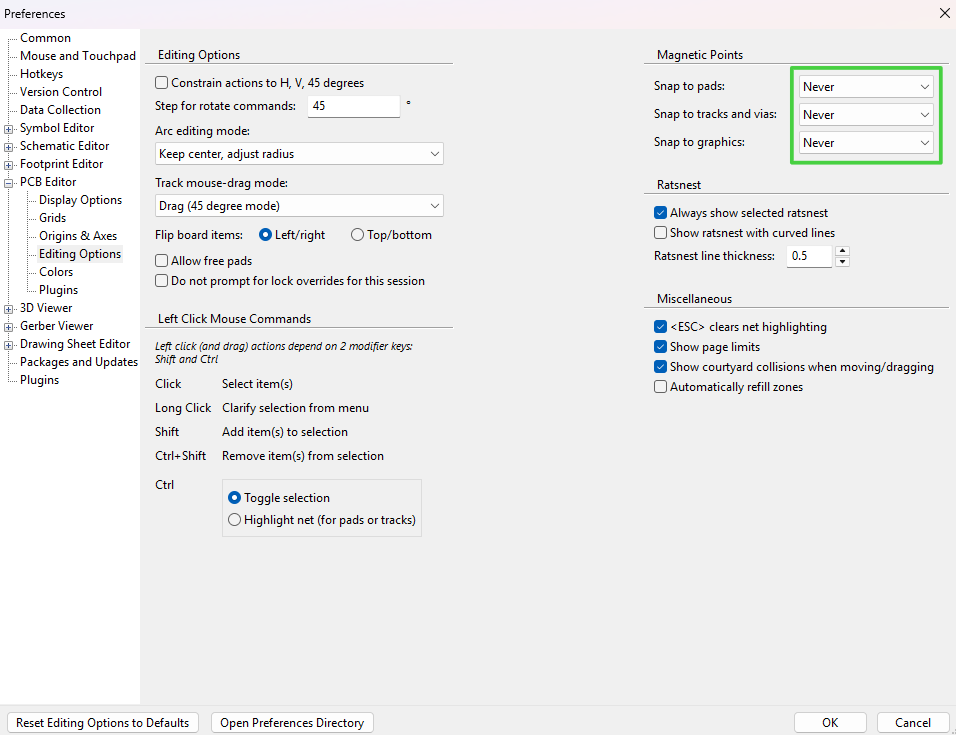
Magnetic Points
If you’re used to a clean, grid-based workflow, the default Magnetic Points setting in KiCAD might feel distracting. Personally, I find it quite annoying, especially when placing components or drawing tracks with precision, as it tends to snap to nearby objects unintentionally.
Unless you have a specific use case for them (like quickly aligning to pads or tracks), I recommend disabling magnetic points for a smoother editing experience.
To do this:
- Go to Preferences → PCB Editor → Editing Options
- Find the Magnetic Points section
- Set all options (for Pads, Tracks, Graphics, etc.) to Never
This gives you full manual control over placement without unexpected snapping behavior.
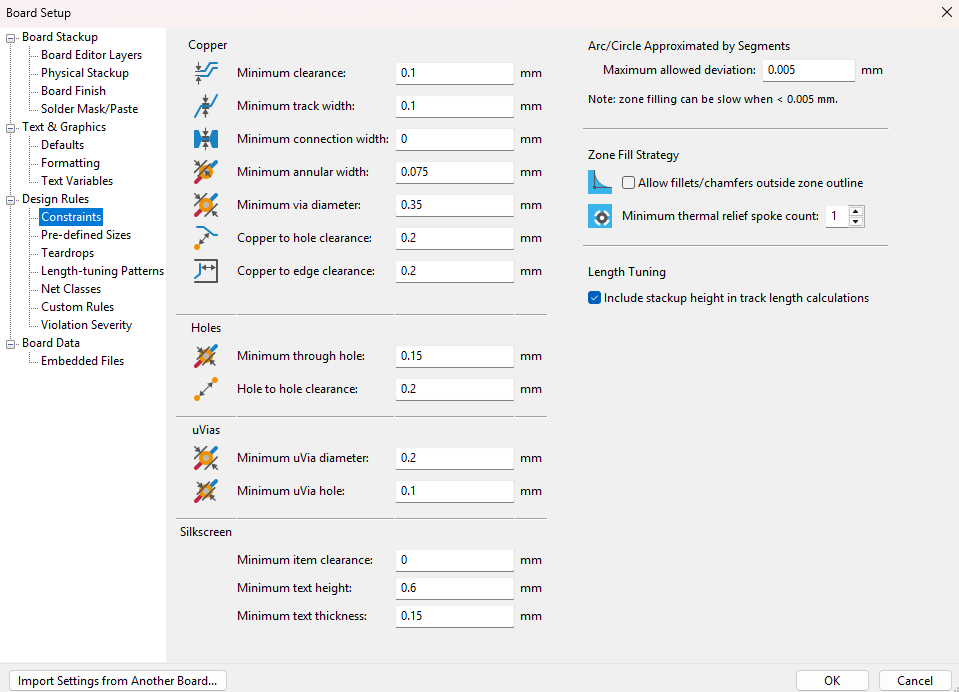
Design Rules
My design rule settings are based on JLCPCB’s fabrication capabilities, which are a reliable reference point for most standard PCB projects. If you’re unsure about the minimum trace width, clearance, or via sizes, feel free to copy my setup. Of course, if you’re planning to manufacture your PCB elsewhere, be sure to update these settings according to your chosen fab house’s specifications.

There’s still a lot more to explore especially when it comes to managing symbols, footprints, and libraries. I’m still refining my approach in that area, and I’ll be sure to update this post as I discover more useful practices or configurations worth sharing. See you soon!